Microsoft Entra Conditional Access is more and more becoming the cornerstone of Access Control and security in the Microsoft cloud and any application that is integrated with it.
This series of blog posts assumes that you have a basic understanding of what Conditional Access is and how it works; if not, there is plenty of documentation on Microsoft’s Docs or other blog posts! Focus in these blog posts will be on how to establish AND maintain a zero-trust design for Conditional Access.
But before I start on that, I first wanted to go through another interesting topic: how to document Conditional Access policies?
There have already been several initiatives to document conditional access. Two of these are well-known and I have been using also myself in the past:
- Excel-based documentation from Claus-Jespersen’s Zero-trust design: ConditionalAccessforZeroTrustResources/ConditionalAccessSamplePolicies/Microsoft Conditional Access for Zero trust persona based policies.xlsx at main · microsoft/ConditionalAccessforZeroTrustResources · GitHub
- Conditional Access documenter from Merill Fernando, which converts your CA policies to a beautiful PowerPoint presentation: idPowerToys (definitely check this one out!)
What I’m missing however when working with customers assisting them with their zero-trust conditional access design, is a comprehensive overview of all policies at one glance and a documentation tool that allows me to have a quick answer to questions such as:
- Which policies apply to a group of users?
- Which policies target (directly or indirectly) Microsoft SharePoint?
- Which policies apply to the IOS or Android platform
- Which policies require a compliant device?
- Etc…
After several attempts, I landed on following approach: a “flat” excel that looks as follows:

Ok, you’ll probably need a 32” 4K screen to get a good overview 😊
You can find the excel here!
(For sake of simplicity, note that the excel as shown above does not show all new features in CA rules, such as multiple guest-types, app filters, etc … We’ll come back to that later on)
So, how does this work?
Let’s first look at the columns. As you can see, structure is very flat, which means that every option that is chosen in one of the CA policies, is a separate column.
- Users: for each user, group or admin role that you have selected in one of your CA policies, add a column; standard columns that are always present, are “None”, “All Users” and “All Guests and External Users” (although this latter one is being replaced by distinct options on guest/B2B types)
- Apps: same principle: for each application add a column; standard columns are the 2 user-actions (“register security info” and “register or join device”), “none”, “All Applications”, “Office 365”
- All conditions are predefined in columns, except for Device Filters; you can predefine some common filters such as “Compliant” or “Hybrid Joined” and add a column for all other device filters (if you would have these).
- For the grant and session controls, same principle: all predefined as shown in the excel above.
What about the rows?
Each row represents a Conditional Access rule, with the name, rule-state (enabled/disabled/report-only) and next the details of the rule:
- If there is an “S”, it means that the value in the header of the column has been explicitly Selected (Included)
- If there is an “E”, the value in the header has been explicitly Excluded
- An “i” means: “implicitly included” … huh? Suppose you select in a rule “All Users”, then automatically any group, role or user is also implicitly included in that rule. With the “i”, this is directly clear at first glance.
- And you guessed correctly, a “e” (minor case E) means “implicitly excluded”
- In the “grants” and “session” controls columns, I use “R” instead of “S” (for readability purposes only)
(note: why “S” and not “I” for explicitly included? Readability mainly: “I” and “i” are harder to distinguish then “S” and “i”)
So, let’s look at one row “CUST1-01 : ALL,All apps, Catch all non-personas block” to get a full understanding of how this works:
- Users: “All users” is explicitly included (S) and the 3 groups “G-AADCA-Internal”, ”G-AADCA-Admins”, ”G-AADCA-BreakGlass” are explicitly excluded (E); note that Guests & External users are implicitly included in the rule (i)
- Applications: “All Applications” is explicitly included (S), so all other applications in the columns are implicitly included (i)
- Conditions: since they are not defined, they are all implicitly included (which means, that whatever the value is at evaluation time of the rule, the rule applies.)
- Grant controls: “Block” is explicitly selected (R).
So, what does this particular rule do? Any user, except users that are member of one of the 3 groups, is blocked for accessing any application on any device, any location, any client app, etc…
I’ll leave it up to you to interpret the other rules as an exercise!
Conclusion: you can have all your CA rules in one excel sheet! And further, this model lends itself very well to automation; more info on that later on!
Now, how does this help in designing and analyzing rules?
Well, note the filters on top 😊 and let’s answer some common questions:
- which rules apply to users in the group “G-AADCA-Internal” when accessing any application on an IOS device when using a browser on a non-compliant device?
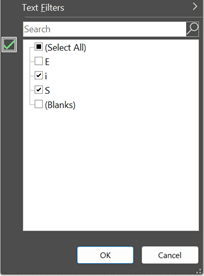
- Filter out all “E”, “e” and blanks (so only “S” and “i” selected); Do this for every column you want to explicitly select
- Result: following rules apply

- Net result is that one rule applies, that will require MFA and “App Protection Policies” under these conditions
- Which rules apply to Windows for the admins persona-group “G-AADCA-Admins” on Windows devices?

What’s next?
I hope you like already this way of documenting CA rules; in my next blog posts, I will go more in-depth on how to design and maintain a zero-trust model and use this documentation approach to hopefully give you a better understanding of how to do that!

Leave a comment